Making the facsimile of the tomb of Seti I
2017


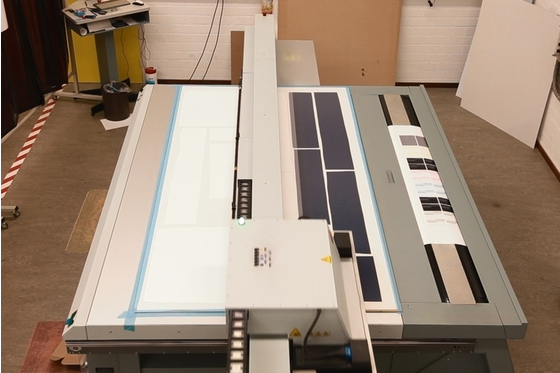
Two main processes were used to re-materialise the low-relief surfaces for the facsimile of the tomb of Seti.
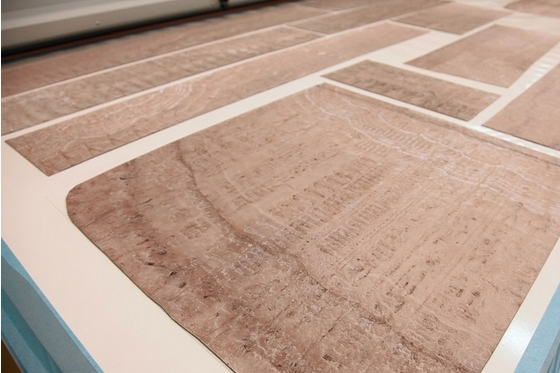
Most of the tomb was carved into boards of polyurethane using CNC milling. The scanned date from the walls of the tomb was routed into panels of approximately 1 x 2m, which were cut into irregularly shaped sections which could be transported and bolted together with invisible joints. Once complete, these panels were assembled to form complete rooms.

© Factum Foundation
The second process used was plaster casting, using moulds which had been 3D printed by Canon Production Printing (previously Océ - A Canon Company). The scan data from the tomb was inverted, with positive relief surfaces were converted into negative relief, and then printed out by Océ using their revolutionary elevated printing technology. The needs of the Seti facsimile in fact led to new developments in Canon Production Printing’s technology, as CPP’s printer was only able to create textured prints up to a height of 5mm, and the tomb walls have a relief which is higher than 5mm. The research and development department of Canon Production Printing therefore created an experimental slicing algorithm and modified the print processes to create prints with the relief necessary to create a perfect facsimile of the tomb.
Casts of the CCP prints were then made using traditional plaster-casting methods, using plaster which had been reinforced with acrylic.

Creating casts from Océ's moulds © Factum Foundation

© Factum Foundation

© Factum Foundation

A mould © Factum Foundation
While Factum Arte’s flatbed digital printer can overprint several layers of colour in perfect register, it cannot print a detailed and focused image onto an undulating surface. Colour was therefore printed onto elastic ‘skins’ which could then be attached to the routed or cast relief surfaces. These skins are made of two thin layers of ink-jet ground backed with an acrylic gesso and then an elastic, acrylic support. They are built in seven layers rolled onto a slightly textured silicon mould. As they have a short working life, they need to be made freshly to ensure that they stretch and fit the surface in the correct way. The skins can be printed in sheets that are one and a half metres wide and up to three meters long, minimizing the number of joints in the final facsimile.

Printing colour onto an elastic 'skin' © Factum Foundation

Printing the roof of the tomb © Factum Foundation
Working with a raking light, the skins were positioned and re-positioned until all details in the print corresponded to the underlying surface, with the elastic support allowing for slight stretching of the surface to ensure a perfect fit. The fit between the paint and the relief surface was seldom obvious and therefore clearly defined registration points - a sharp angle of flaking paint, a defined crack, the edge of a damaged area - needed to be identified. In the case of the tomb of Tutankhamun, the slight relief and clearly defined edges of the micro-bacteria had been the dominant positional guides, but the tomb of Seti was missing these clear markers and it was more difficult to find a perfect fit.

© Factum Foundation

© Factum Foundation

Assembling the ceiling of the tomb © Factum Foundation
The skins were then pinned in place and folded back. A slow-cure contact adhesive was applied to both sides, ensuring that the skins did not move but also providing the possibility for repositioned as required. Sight and touch were essential to ensuring the exact relationship between the surface and the colour.
Once the skins have been positioned, pressed down, and held in place by contact adhesive they were put into a vacuum bag with a polyester blanket. A uniform pressure was applied using a vacuum pump, ensuring full contact and adhesion between the skin and the support. Due to the gossamer-like, elastic nature of a skin it takes on the character of the underlying relief, resulting in a surface where the colour and texture are fused together.

© Factum Foundation
The skins and 3D panels have irregular edges which needed to be retouched by hand. This was done by a team led by Factum's restoration specialist.

The recreation of the Hall of the Beauties as Belzoni would have known it © Factum Foundation

© Factum Foundation

The point at which two panels meet © Factum Foundation

© Factum Foundation
The panels were assembled to create the facsimile of the tomb.

© Factum Foundation

© Factum Foundation

© Factum Foundation
In addition to the tomb itself, facsimiles of the fragments recorded in museums across the world were also created.

© Factum Foundation
The LiDAR scan of the tomb was rematerialised so that visitors could 'travel' through the entire building as they entered the exhibition.

© Factum Foundation

© Factum Foundation
The main box of the sarcophagus was routed in sections in high-density polyurethane using a 7-axis CNC robot and joined together by hand. The surface was printed out by Canon Production Printing in sections, which were then fitted to the box.
Océ elevated printing was used to print the colour information of the sarcophagus

Printing layers of colour and relief progressively
Printing layers of colour and relief progressively

Printing layers of colour and relief progressively

© Factum Foundation

© Factum Foundation
The sarcophagus was finished by hand, with the joints between sections retouched using an acrylic putty which was blended using a mixture of watercolour and acrylic paint. The facsimile was finished with natural wax in imitation of the sheen of alabaster. You can download a comprehensive report on the making of the sarcophagus here.

© Factum Foundation

© Factum Foundation
A separate facsimile was made of the sarcophagus lid.

© Factum Foundation
You can find out more about the exhibition 'Scanning Seti' here.


